Sniper Monk spec

Posted by Brian On February 23, 2014 ADD COMMENTS

This is my Sniper Monk spec.

Click HERE to see on WoWhead

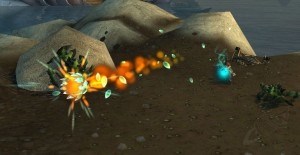
This build is designed to devastate your enemies from afar without as much as a scratch. The main few abilities that are used are the Spinning Fire Blossom and Crackling Jade Lightning. So, this spec will not be usable until level 54, but it is hilarious to watch, and even funnier to play. Ascension will be a very big help, due to increasing the amount of chi you can have to 5 and your energy regeneration too by 15%. Chi Wave can also be used to get in some damage and some healing as well in case your enemy uses a ranged attack.

(more…)

Burn to Ashes 5.4 spec

Posted by Brian On September 21, 2013 ADD COMMENTS

Burn to Ashes is a Fire Mage talent spec designed around encompassing your enemy in fire until they become dust in the wind.

Click here to see the spec on WoWhead!

The main spells used will be Living Bomb, Combustion, and Pyroblast. However, Pyroblast will mainly only be cast when you are either just starting out a fight, or in the cases of PvP whenever you don’t have an enemy up close. These situations call for Dragon’s Fire, so they can be dazed and allow you to move away from your enemy via Blink (utilizing the Glyph of Momentum, which will help you to move backwards while still facing your enemy).

To further help in survivability (as always mentioned first since I like to protect myself while doing damage), Ice Floes can also help buy some time, allowing you to move around while casting your spells. Also, even though Flameglow doesn’t add much to damage mitigation, it is an effect that is on going in helping to protect your character. Ice Ward and Frost Nova help to also keep enemies away from you, freezing your enemies in place allowing you to move away with Blink, or walk away while casting via Ice Floes. There is also healing available to the Mage (sometimes a much needed attribute) via Glyph of Evocation, which can be activated at anytime with the Invocation talent and also gives a good amount of added mana at the same time along with a 15% added damage buff. Also, whenever things get too hairy for the Mage, Greater Invisibility can get enemies off of your back in a flash, as well as give you a better vantage point over your enemy (in the case of PvP). Also, the Armors Glyph will allow your Molten Armor to withstand more damage (especially in conjunction with Flamglow).

Groups are easier to take down due to Inferno Blast and it’s associate Glyph, which allows the player to spread a Pyroblast, Ignite, or Combustion effect to an additional enemy. However before you begin with taking on a group, there will be some precautions that should be taken first. To begin, I recommend casting an Invocation to gain the damage bonus.  Then use Living Bomb on up to 3 of your targets and follow up with a Pyroblast and a couple of Scorches until you get a critical hit, causing an Ignite effect. Then, once you have your critical hit, cast Inferno Blast (which is an automatic critical hit) allowing for a free and instant cast of Pyroblast. After this, you can continue to cast either Scorches or Fireballs while using Frost Nova, Ice Ward and Dragon’s Fire to keep your enemies off of you while burning them to the ground.

All in all, Burn to ashes is based around the thought of keeping a lot of damage on your enemies while continually bathing them in more fire!

Bushido spec

Posted by Brian On August 24, 2013 ADD COMMENTS

This is my latest Monk spec, Bushido. I used this spec on my Windwalker Monk from level 70 and up to take down my opponents. (I will post my hilarious level 1 – 69 long range Sniper spec another day).

Click here to see the spec on WoWHead

This spec is all about keeping yourself at maximum health for as long as possible, by constant healing, preventing damage or just all out redirecting it. For this purpose, Glyph of Expel Harm is a must. Also, I love Chi Torpedo and getting to use it 3 times in a row with Celerity is hilarious (especially since it can be directed in all of 8 directions instantly). Now as for the damage aspect, Fists of Fury was my go to for situations where I had 3-4 enemies on me at a time, mainly for the stun, since Zen Sphere could be placed on 1 enemy as well as myself followed by my pummelling with Fists of Fury (which comes with a wonderful free stun). Afterlife is a life saver since a single enemy is easily dispatched giving you a chance at having the Healing Sphere drop for you, reducing the need to bring food with you (unless you wanted cooked food it for the bonus). Once level 56 is hit, the Windwalker Monk is a true force to be reckoned with, increasing all damage dealt to nearby targets by an astonishing 20% and reducing healing received along with Tigereye Brew to increase damage dealing further.

As for the survival aspect, Healing Elixirs is amazing in conjunction with Tigereye Brew or Energizing Brew to gain more life. Touch of Karma can be used on enemies up to 20 yards (thanks to the glyph) so no worries about ranged enemies pounding on you while you are taking down melee opponents. Ascension will give you the opportunity to have more uses of your chi required abilities. If the enemies around you start to bog you down after the Touch of Karma has worn off, feel free to perform a Leg Sweep, stunning all of your melee enemies, then roll to that pesky ranged enemy and beat the tar out of them, or use Storm, Earth and Fire to take him out while still attacking the melee enemies. So many choices so little time!

Sparring will also help to keep damage away from you, even further with the Glyph, which adds the negation effect to spells as well. If you have already used up all of your Chi Torpedoes and need to cover more distance, use Flying Serpent Kick to make the rest of the distance to the ranged enemy (especially for PvP of course, since Chi Torpedo already covers a good range) and also deal some damage as well as slow them down (which is also great in the PvP setting for flag carriers, who probably aren’t looking behind them!).

All in all, Bushido will instil the way of the warrior in you, granting enough power and discipline to take on any manner of foe!

Bloodspiller spec 5.2

Posted by Brian On June 23, 2013 ADD COMMENTS

Another updated spec, this time it’s for Arms Warriors, allowing the blood to flow out of their enemies’ veins while keeping their own. The one thing that the Arms Warrior has to be sure of is to have a good 2 handed weapon with them at all times. This is how they deal most of their damage via Seasoned Soldier, gaining 25% increased damage. Thankfully, 5.2 has made things a bit easier with this spec, removing Rend and tying it into Mortal Strike, and allowing Mortal Strike to grant the warrior 2 uses of their signature ability, Overpower.  Also, due to the new version of Blood and Thunder (which used to be a talent requiring 3 points for this spec), Thunder Clap not only reduces physical damage dealt by enemies, but also applies Deep Wounds. Victory Rush is still your main go to ability for whenever you are low on health, however there are a few changes for the better for this spec.

Click here to see the spec on WoWhead!

One example is that I actually used to stay away from Execute. The reason was because it cost all of your rage when previously my Overpower would do approximately the same amount of damage to my enemies, due to the cutoff of 30 rage. However, Sudden Death brings new life to this skill, since both Mortal Strike is free to cast, and grants 2 Overpowers, and if an Execute is used before the Overpowers, then the Overpowers will both also be free to cast, as well as any others within a 10 sec duration (which from counting Mortal Strikes alone can be a total of 4 Overpowers due to the 6 second cool down). Blood Spiller also has a wonderful new ability granted at level 90, aptly named for the spec, Bloodbath. Every minute this ability can be triggered to give all of your attacks the effect of dealing an additional 30% more damage as a bleed effect over 6 seconds. So, what I have done for fun, against groups of 5+ enemies, is to use Thunderclap, reducing their damage and causing a bleed, followed by Bloodbath, Sweeping Strikes, and lastly Bladestorm. This combo will tear all foes around you to pieces in a matter of moments. Plus, anything that doesn’t die is easily killed afterward, considering that with the Glyph of Sweeping Strikes you gain 1 rage for each enemy that was hit.

As for keeping the Warrior healthy, a few new additions have been made here as well. Disrupting Shout, Warbringer, and Mass Spell Reflection have come to join the fray, allowing the warrior to prevent spell casting (although Warbringer has to be done from afar so this will more than likely be a PvP related caster delay, unless something was done to agro a far way opponent). Second Wind is still old reliable, and has gotten better due to healing 3% at all times while under 35% hit points. This ability now also generates 50% more rage than it used to pre-5.2. Also, while at higher levels, don’t forget about your Banner abilities, they can get you out of bad situations via giving the warrior additional crit chance, reducing enemy damage, or if in a party, then redirecting enemy attention to the Warrior (which I have used to actually prevent a wipe to protect a Druid during a battle Rez from getting killed).

This spec is back in action and it has blood in its eyes (not necessarily its own!).

Unholy Embrace 5.2

Posted by Brian On April 6, 2013 ADD COMMENTS

This was the 1st spec i had created that was open ended (OE) and I am intending on keeping it this way, since it gives a little more flexibility for the player. This is an Unholy Death Knight spec.

Click to see spec on WoWHead

The main point of this spec was and still is to keep your diseases on your enemies at all times, which Unholy Blight does a great job of. This will also allow the Death Knight more runes to use Festering Strike (to change frost and blood runes into death runes) while using your 2 Unholy runes into Scourge Strike (which is one of your primary damage ability). While your runes are recharging, Death Coil (which is also one of your other primary damage abilities) will be your attack of choice. Not only will this deal some decent damage, but it will also power up your Ghoul minion. For times in which you need more damage to be thrown around, Glyph of Unholy Frenzy will allow you to use Unholy Frenzy without worry of taking more damage. Also, ensure you are using Unholy Presence.

As for survivability, there are several abilities in this spec to help when the Death Knights own demise seems inevitable. Thankfully, once you have built up all of your death runes, this spec can use 4 consecutive Death Siphons. To follow that, you can target yourself and cast Lichborne (I recommend making a macro to do that for you)

/target (your characters name without the parenthesis)
/cast Lichborne 

Then proceed to cast Death Coil on yourself until you have enough health, or have run out of runic power (and these still increase your Ghoul’s power and add up to be able to cast Dark Transformation). Also, every time you cast your Death Coil, Runic Corruption has a 45% chance to proc, allowing your Runes to be ready sooner (possibly some as Death runes, if you have just used Festering Strikes). Remorseless Winter is also useful if you need to back away from a few enemies or be able to stop them dead in their tracks for a few seconds for a little breathing room. Glyph of Anti-Magic Shell will stop enemy caster from hitting you, and will also supply you with more needed runic power to cast more Death Coils. Also, if you want a faster way to develop your Dark Transformation, you can have your ghoul go to the fray first, using spare rune power to heal your pet for only 20 (instead of 40 due to Glyph of Death’s Embrace) which will get you 5 stacks of Shadow Infusion with only 100 runic power instead of 200.

As for the Open Ended (OE) part of this spec, I have left the choices of Death’s Advance, Chilblains, and Asphyxiate, as well as 1 major Glyph. I like Asphyxiate, but the times when they other 2 are usable, they really shine in their niches. As for the Major Glyph opening, there are several good choices. Outbreak may not be too great of a choice, due to this spec needing to use its Death Coil. However, Death Coil can help protect your friends, while Pestilence could be of use while your Unholy Blight is on cool down. Death Grip is good for giving a better range, but if you are soloing, then Unholy Command is a better choice.

Keep a high Mastery (to increase shadow damage) and Critical Strike chance (also for damage) to allow your strikes to keep as much power as possible. This way, your Scourge Strikes and Death Coils are always dealing as much damage as possible. Also, make sure you keep an eye on how long your diseases have left on them, since it’s better to use a Festering Strike than to need to re apply your diseases.

Friends